6g
NET CARBS
PHASE 1
کیٹو
Low-Carb
High-Protein
Gluten-Free
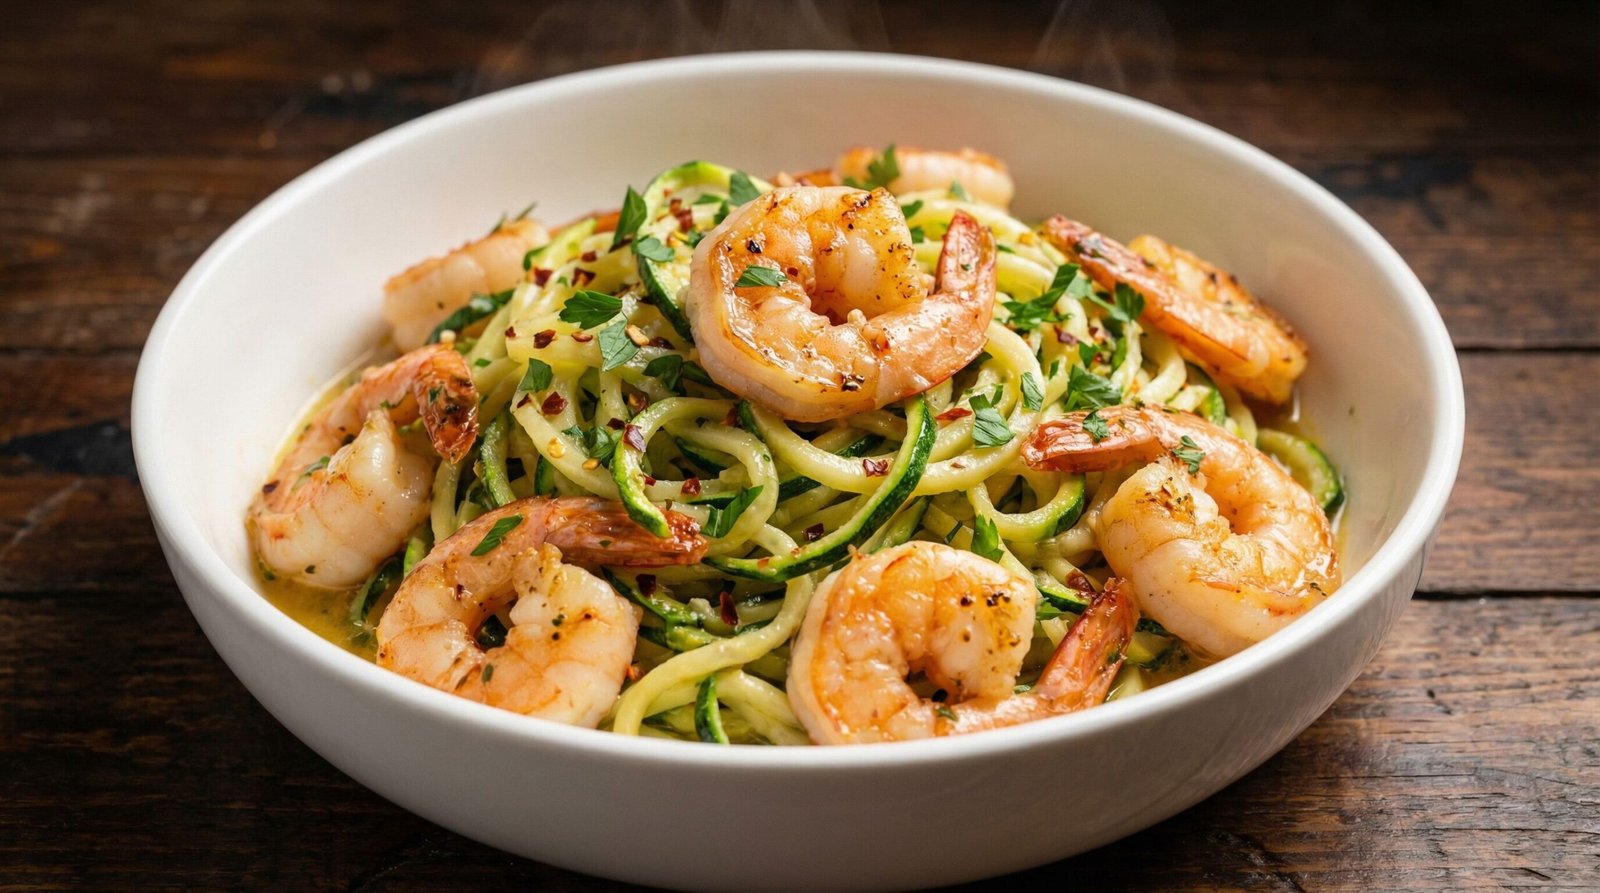
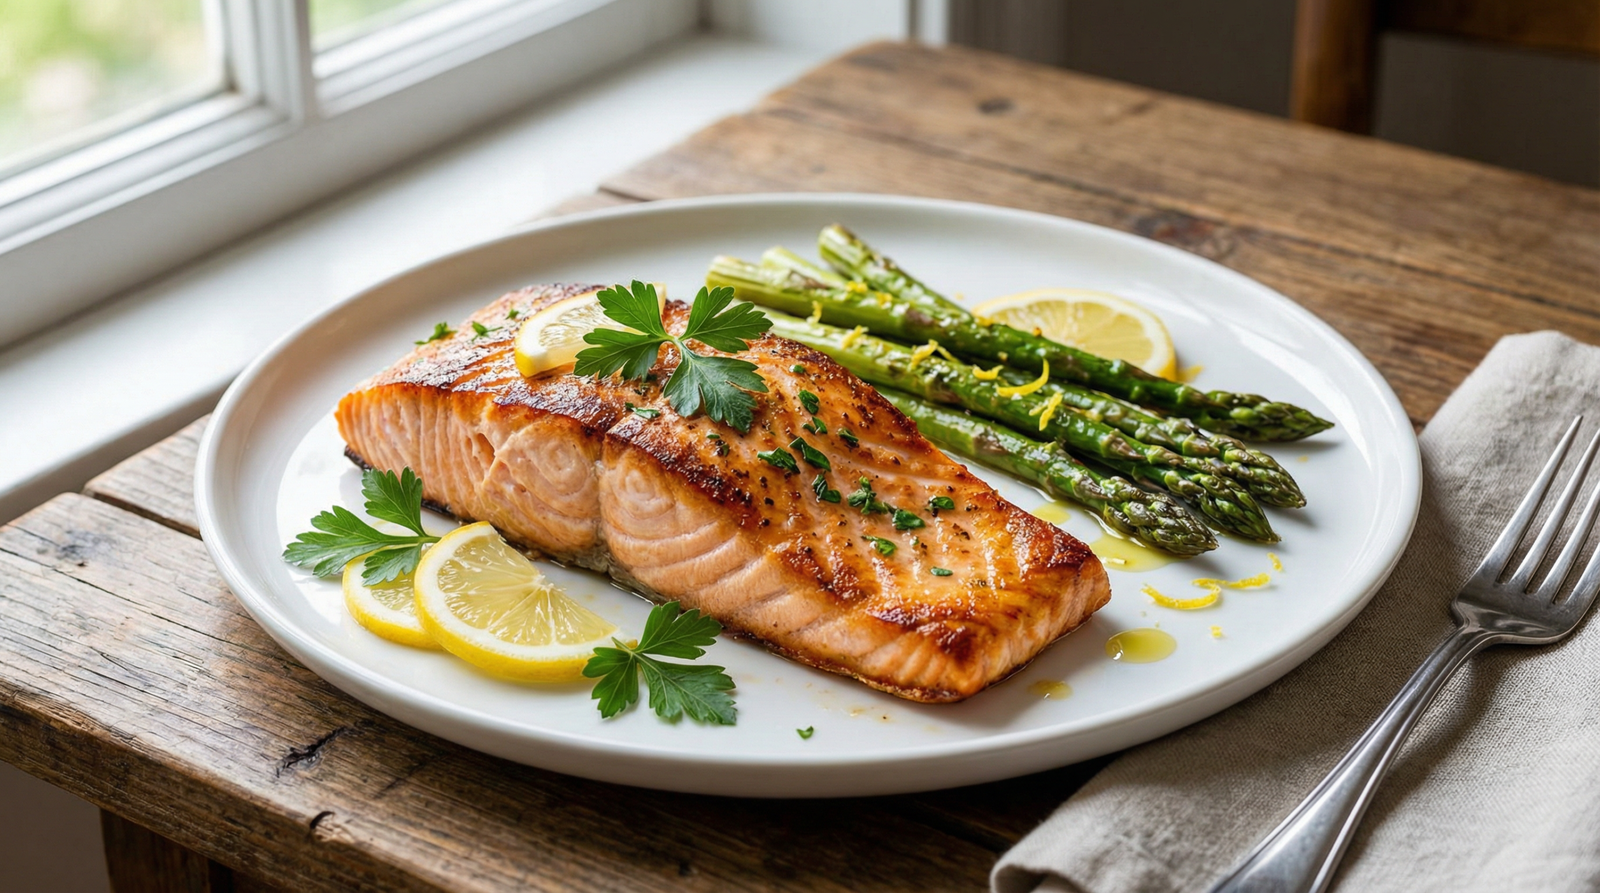
Garlic Butter Shrimp with Zucchini Noodles
⏱️ Prep: 15 min
🔥 Cook: 10 min
👥 Serves: 4
⚡ Difficulty: Easy
This restaurant-quality dish comes together in just 25 minutes! Succulent shrimp are sautéed in a rich garlic butter sauce and served over tender zucchini noodles. It’s a light yet satisfying dinner that’s perfect for busy weeknights. The zoodles absorb all that delicious garlicky butter, making every bite absolutely irresistible.
✅ Diabetes-Friendly Highlights
اجزاء
For the Shrimp
- ☐ 1 lb large shrimp, peeled and deveined
- ☐ 4 tbsp butter
- ☐ 6 cloves garlic, minced
- ☐ ¼ cup dry white wine (or chicken broth)
- ☐ 2 tbsp fresh lemon juice
- ☐ ¼ tsp red pepper flakes (optional)
- ☐ Salt and pepper to taste
For the Zucchini Noodles
- ☐ 4 medium zucchini, spiralized
- ☐ 1 tbsp olive oil
- ☐ Salt to taste
For Garnish
- ☐ Fresh parsley, chopped
- ☐ Lemon wedges
غذائیت حقائق
Per Serving
| Calories |
320 |
| Total Fat |
18g |
| Saturated Fat |
9g |
| Cholesterol |
215mg |
| Sodium |
480mg |
| کل کاربس |
9g |
| فائبر |
3g |
| Sugar |
4g |
| نیٹ کاربس |
6g |
| پروٹین |
26g |
ہدایات
1
Prepare the Zucchini Noodles
Use a spiralizer or julienne peeler to create zucchini noodles. Pat them dry with paper towels to remove excess moisture—this prevents them from becoming watery when cooked.
💡 Tip: Salting zoodles for 10 minutes and squeezing out water makes them less soggy.
2
Season the Shrimp
Pat the shrimp dry with paper towels and season with salt, pepper, and a pinch of red pepper flakes if using. Dry shrimp will sear better and develop a nice golden color.
💡 Tip: Wet shrimp will steam instead of sear—always pat them completely dry.
3
Cook the Shrimp
Melt 2 tablespoons of butter in a large skillet over medium-high heat. Add the shrimp in a single layer and cook for 1-2 minutes per side until pink and opaque. Remove and set aside.
💡 Tip: Don’t overcrowd the pan—cook in batches if needed for the best sear.
4
Make the Garlic Butter Sauce
In the same skillet, add the remaining 2 tablespoons of butter. Once melted, add the minced garlic and sauté for 30 seconds until fragrant. Add the white wine and lemon juice, scraping up any browned bits from the bottom.
💡 Tip: Don’t burn the garlic—it turns bitter. Keep it moving in the pan.
5
Cook the Zoodles
Add the zucchini noodles to the sauce and toss to coat. Cook for 2-3 minutes until just tender but still slightly crisp. Don’t overcook or they’ll become mushy.
💡 Tip: Zoodles cook quickly—2-3 minutes is all they need to stay al dente.
6
Combine and Serve
Return the shrimp to the skillet and toss everything together. Divide among plates, garnish with fresh parsley and lemon wedges. Serve immediately while hot.
💡 Tip: A squeeze of fresh lemon at the table brightens all the flavors.
🩺 Diabetes Management Tips
Why This Recipe Works
Zucchini noodles replace traditional pasta, cutting carbs from 40g+ to just 6g net carbs per serving. You get the same satisfying “pasta” experience without the blood sugar spike.
Protein Benefits
Shrimp is an excellent lean protein source with 26g per serving. It’s low in calories and fat while providing essential nutrients like selenium and vitamin B12.
Smart Substitutions
Use ghee instead of butter for dairy-free. Replace white wine with chicken broth to eliminate alcohol. Add spinach for extra fiber and nutrients.
Healthy Fats
The butter provides satisfying fats that help slow digestion and keep you feeling full. Healthy fats also help your body absorb fat-soluble vitamins from the zucchini.
📦 Storage & Leftovers
Store leftovers in an airtight container in the refrigerator for up to 2 days. Note that zucchini noodles will release water when stored, so drain before reheating. Reheat gently in a skillet over medium heat—avoid the microwave as it can make the shrimp rubbery. For best results, cook only what you’ll eat immediately.
This recipe was developed specifically for the Living Diabetes community. We’ve optimized it for blood sugar management while maximizing flavor and satisfaction. Always consult your healthcare provider about dietary changes.
Additional notes
This Garlic Butter Shrimp with Zucchini Noodles is a perfect low-carb meal that is both satisfying and incredibly quick to make. In less than 20 minutes, you can have a delicious, healthy dinner on the table that is packed with flavor. The combination of succulent shrimp, fresh zucchini noodles, and a rich garlic butter sauce is a winner for any night of the week.
## Why You’ll Love This Recipe
– **Quick and Easy:** This dish comes together in under 20 minutes, making it ideal for busy weeknights.
– **Low-Carb and Keto-Friendly:** With zucchini noodles instead of traditional pasta, this recipe is perfect for anyone following a low-carb or ketogenic diet.
– **Healthy and Nutritious:** Shrimp is a great source of lean protein, and zucchini is packed with vitamins and minerals.
## Ingredients
* 1 lb large shrimp, peeled and deveined
* 4 medium zucchini, spiralized
* 4 tbsp butter, unsalted
* 4 cloves garlic, minced
* 1/4 cup chicken broth
* 1 tbsp lemon juice, fresh
* 2 tbsp fresh parsley, chopped
* Salt and black pepper to taste
* Red pepper flakes (optional, for a little heat)
## Instructions
1. **Prepare the Zucchini Noodles:** If you haven’t already, use a spiralizer to turn your zucchini into noodles. Set them aside.
2. **Cook the Shrimp:** In a large skillet, melt 2 tablespoons of butter over medium-high heat. Add the shrimp and cook for 1-2 minutes per side, until pink and cooked through. Remove the shrimp from the skillet and set aside.
3. **Make the Sauce:** In the same skillet, melt the remaining 2 tablespoons of butter. Add the minced garlic and cook for about 30 seconds, until fragrant. Be careful not to burn the garlic.
4. **Combine:** Pour in the chicken broth and lemon juice, and bring to a simmer. Let the sauce reduce for 2-3 minutes. Return the cooked shrimp to the skillet.
5. **Add Zucchini Noodles:** Add the zucchini noodles to the skillet and toss everything together to coat the noodles in the sauce. Cook for 2-3 minutes, until the zucchini noodles are tender but still have a slight crunch. Do not overcook, as they can become watery.
6. **Serve:** Remove from heat, stir in the fresh parsley, and season with salt, pepper, and red pepper flakes (if using). Serve immediately and enjoy!
### Nutritional Information (Approximate)
* **Calories:** 350
* **Protein:** 30g
* **Fat:** 20g
* **Net Carbs:** 8g
Additional notes
This garlic butter shrimp with zucchini noodles is a light, flavorful, and incredibly easy-to-make meal that’s perfect for a healthy weeknight dinner. It’s a low-carb, gluten-free, and keto-friendly dish that comes together in under 20 minutes. The combination of succulent shrimp, fresh zucchini, and a rich garlic butter sauce is simply irresistible.
- 1 lb large shrimp, peeled and deveined
- 4 medium zucchini, spiralized
- 4 tablespoons unsalted butter
- 4 cloves garlic, minced
- 1/4 cup chicken or vegetable broth
- 1 tablespoon lemon juice
- 2 tablespoons chopped fresh parsley
- Salt and freshly ground black pepper to taste
- Red pepper flakes (optional, for a bit of heat)
- Pat the shrimp dry with a paper towel and season with salt and pepper.
- In a large skillet, melt 2 tablespoons of butter over medium-high heat. Add the shrimp and cook for 1-2 minutes per side, until pink and cooked through. Remove the shrimp from the skillet and set aside.
- In the same skillet, melt the remaining 2 tablespoons of butter. Add the minced garlic and cook until fragrant, about 30 seconds.
- Add the chicken broth and lemon juice to the skillet, scraping up any browned bits from the bottom of the pan. Bring to a simmer and let it reduce slightly.
- Add the zucchini noodles to the skillet and toss to coat in the sauce. Cook for 2-3 minutes, until the zucchini is tender-crisp. Be careful not to overcook, as the zucchini will become watery.
- Return the shrimp to the skillet and toss everything together. Stir in the fresh parsley and season with additional salt, pepper, and red pepper flakes if desired.
- Serve immediately and enjoy!
Shrimp is an excellent source of lean protein and provides important nutrients like selenium and vitamin B12. Zucchini is low in carbs and calories but high in water and fiber, making it a great choice for weight management and digestive health. This dish is a fantastic way to enjoy a satisfying and nutritious meal without the heavy carbs.
Looking for more delicious and healthy low-carb recipes? Check out our full recipe collection for breakfast, lunch, dinner, and snack ideas.
Additional notes
This garlic butter shrimp with zucchini noodles is a light, flavorful, and incredibly satisfying meal that comes together in under 20 minutes. It’s a fantastic low-carb alternative to traditional pasta dishes, and it’s packed with protein and healthy fats. The combination of succulent shrimp, tender zucchini noodles, and a rich garlic butter sauce makes this a recipe you’ll want to make again and again.
- Quick and Easy: This dish is perfect for a busy weeknight, as it comes together in just a few simple steps.
- Low-Carb and Keto-Friendly: Zucchini noodles are a great way to enjoy a pasta-like meal without the carbs.
- Packed with Flavor: The garlic butter sauce is simple yet incredibly flavorful, and it pairs perfectly with the shrimp and zucchini.
- Healthy and Nutritious: This meal is a great source of lean protein, healthy fats, and vitamins.
- 1 lb large shrimp, peeled and deveined
- 4 medium zucchini, spiralized into noodles
- 4 tbsp butter
- 4 cloves garlic, minced
- 1/4 cup chicken broth
- 1/4 tsp red pepper flakes (optional)
- Salt and freshly ground black pepper to taste
- 2 tbsp fresh parsley, chopped
- 1 tbsp lemon juice
- Prepare the Zucchini Noodles: If you haven’t already, use a spiralizer to turn the zucchini into noodles. Set aside.
- Cook the Shrimp: In a large skillet, melt 2 tablespoons of butter over medium-high heat. Add the shrimp and cook for 1-2 minutes per side, until pink and cooked through. Remove the shrimp from the skillet and set aside.
- Make the Sauce: In the same skillet, melt the remaining 2 tablespoons of butter. Add the minced garlic and red pepper flakes (if using), and cook for about 30 seconds, until fragrant.
- Combine: Add the chicken broth and lemon juice to the skillet, and bring to a simmer. Add the zucchini noodles and toss to coat them in the sauce. Cook for 2-3 minutes, until the zucchini noodles are tender-crisp.
- Finish and Serve: Return the cooked shrimp to the skillet and toss everything together. Season with salt and pepper to taste. Garnish with fresh parsley and serve immediately.
- Lean Protein: Shrimp is a great source of lean protein, which is important for muscle growth and repair.
- Low in Carbs: Zucchini noodles are a low-carb, low-calorie alternative to traditional pasta, making this dish great for blood sugar management.
- Healthy Fats: Butter provides healthy fats that can help you feel full and satisfied.
- Vitamins and Minerals: Zucchini is a good source of vitamins A and C, as well as potassium.
This garlic butter shrimp with zucchini noodles is a delicious and healthy meal that is sure to become a new favorite. It’s a great way to enjoy a satisfying and flavorful meal without compromising your health goals.
Related articles